Wednesday, July 3, 2013

Investigating iceberg lettuce in the hydroponic greenhouse – 2013 Trial, Part 1


Investigating iceberg lettuce in the hydroponic greenhouse – 
2013 Trial, Part 1
 
By Natalie Bumgarner, Horticulturist
CropKing, Inc. Lodi OH


Why isn’t there hydroponic greenhouse iceberg lettuce?

Lettuce is the 2nd most popular vegetable in the US (second only to potato), and head lettuce is certainly the most recognizable type. So, it is not uncommon for us to hear the question “Why don’t you produce iceberg lettuce in the greenhouse?”  There are, in fact, several key reasons iceberg lettuce is not commonly grown in vegetable greenhouses in the United States. They are listed below and loosely ranked by importance, but these reasons may vary depending on production area and market. 
 
1)  Market potential and price

One of the most important reasons that we do not see head lettuce in the greenhouse is because the economics of the market are not always encouraging. Nearly all of US head lettuce is produced in California (spring through fall) and Arizona (winter). Huge expanses of open field production are dedicated to lettuce production in some of the most productive cropping areas in the world. Soil and climate factors make these regions quite appropriate for head lettuce production and the scale of production also contributes to competitive advantages. For example, recent terminal market data reported that head lettuce cartons (approximately two dozen 2 lb. heads of lettuce) are selling for $11.00 to $17.00. These prices illustrate that greenhouse producers are unlikely and unwilling to produce head lettuce at prices that could be competitive with field production.  An additional facet to this topic of markets is that recent per capita consumption of head lettuce has been flat or on the slight decline as other leafy vegetables have become more popular.

Iceberg lettuce typical in California open field  production. Specific cultivars are slotted in specific times of year for production regions of CA and AZ across the entire year.


 2) Production time

Typically in the open field, head lettuce matures in 70 to 80 days in the summer and up to 130 days in winter or lower light and temperature seasons. Of course one of the benefits of greenhouse production is the potential for faster growth rates and reduced production times. To date, in summer greenhouse production in OH, we have harvested our iceberg lettuce approximately 55 to 60 days after seeding. However, the total weight of our lettuce may not equal field packed cartons. This production time contrasts with a bibb production schedule in the greenhouse which might produce a crop in 40 to 50 days. 

3) Nutrition

As consumers become conscious of the nutrient and antioxidant levels in their food, they continue to become more discerning in food purchases. Due to underlying genetics, plant growth form and a few other factors, iceberg lettuce is not the most nutrient dense leafy green vegetable. The table below (From USDA National Nutrient Database for Standard Reference Release 24 ) gives average nutrient information for the most common types of lettuce. Remember that these are averages from primarily soil grown crops from around the country, so they do not represent the exact profile of product from individual greenhouses or cultivars. Nevertheless, this table does support the generally held perception that iceberg lettuce contains fewer nutrients per serving that other lettuces and certainly other leafy greens. However, keep in mind that iceberg lettuce from greenhouses has been less often evaluated than that from the open field.   

4)    Customer Preference and Perception

This potential reason for the lack of iceberg lettuce in US greenhouses is linked with the nutrition topic discussed above. Most greenhouse lettuce producers are growing and marketing their crop as a premium product. This means that the quality of the crop is crucial, but the perception of the crop is also important. Iceberg lettuce is often viewed by many discerning consumers as inferior in taste, visual appeal, and nutrition to the bibb, romaine and leaf lettuces. There is also little attraction based on novelty or distinctiveness. These views mean that many of the most profitable potential customers for hydroponic greenhouse producers may be less interested in iceberg than other leafy crops. However, if greenhouse producers were able to market a product with comparable attributes (crisp, multiple servings per head, etc) and improved taste, freshness, or nutrition, these perceptions and preferences could change.


5)    Adaptability of cultivars and environments 

Much of greenhouse lettuce production (especially bibb) utilizes cultivars that were specifically bred and developed for greenhouse environments. These cultivars can generally be depended upon to perform consistently across seasons and even geographic areas. When investigating types of lettuce, like iceberg, that are less often produced in greenhouses, preferable cultivars and knowledge of how they may perform is limited.

Additionally, iceberg lettuce often requires specific environmental conditions to produce the tight head consumers are accustomed to- without bolting or becoming bitter. So, even though we can control temperatures closely in greenhouses, producers may not be able to exactly emulate conditions that are common in field iceberg production. There may be more seasonal constraints of light and temperature on iceberg production in many US greenhouses than we experience in producing other types of lettuce.   


So, why would we be interested?

After spending the time to try and elucidate why iceberg is rarely produced in hydroponic greenhouses, you are probably asking what would possibly be the attraction. While I will be the first to admit that greenhouse iceberg is unlikely to become a US market force in the near future, there are some reasons for investigation.

First, familiarity is not always a negative. Some consumers will always be attracted to what they know best and producers should always be ready to fill small market niches if they are possible and profitable- especially if they can provide a product with superior quality. 

Secondly, we at CropKing deal with producers not only in the US, but also internationally. Market demands and dynamics may differ considerably in these areas. For instance, in the Caribbean islands where imports are expensive and often of poor quality, iceberg may be both desired by consumers and potentially profitable for greenhouse growers.

 Thirdly, it is always important to investigate potential crops and understand both the benefits and drawbacks to their cultivation to assist current and future producers- essentially, we need to have solid backing to the answers that we give growers.

Goals and Early Observations

Main Objectives
      Produce 5 iceberg cultivars in spring and summer greenhouse environments in OH
      Evaluate yield as well as broad metrics of internal and external quality
      Evaluate production timing and suitability for the CropKing NFT system

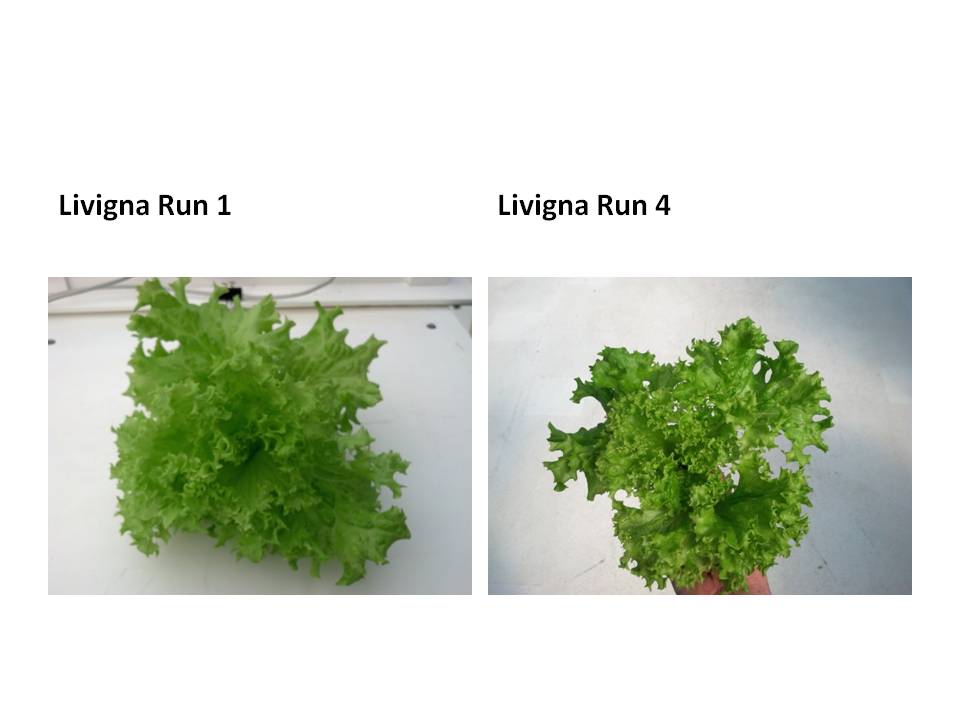
After one run, we observed
      Head lettuce production was possible
      Head weight and density may not be the same as field iceberg
      Not all cultivars appeared to be well suited to our conditions because some bolting and tipburn occurred
      Anecdotally, the taste of the produce was encouraging 

Additional Sources

Thursday, May 9, 2013

Late Fall to Spring Leaf Lettuce Trial


Late Fall to Spring Leaf Lettuce Trial
Results from four separate trial runs of nine leaf cultivars 
in NFT production systems
Dr. Natalie Bumgarner

Objectives

Hydroponic lettuce production in the United States now encompasses a wide spectrum of lettuce types and cultivars. While Bibb cultivars still occupy a large percentage of the market, many growers are also seeking attractive and distinctive lettuce cultivars to meet consumer demand. Due to these factors, leafy cultivars, including looseleaf and Lollo types, are becoming more common in hydroponic greenhouses. However, some of these cultivars have been more often grown in soil based systems, and there is a need to better understand their performance in the greenhouse. Consistency in both productivity and timing is important for greenhouse growers, and seasonal conditions can have a large impact on cultivar performance. Trialing of available cultivars under differing conditions is important in informing grower decisions. Important points of evaluation are growth rate, yield and visual coloration. The goal of this set of trials was to evaluate a selection of leaf lettuce cultivars through a range of late fall, winter, and early spring conditions to evaluate their potential for greenhouse growers in the Midwest and northeast. Cultivars were obtained from varied seed suppliers to represent a broad selection of cultivars available to lettuce producers. 

Methods and Management

Primed and pelleted seeds were seeded by hand in pre-moistened 1” x 1” x 1 ½” rockwool cubes. Seeds were germinated in clear water in seeding trays in the nursery. Nutrient solution was added in the nursery 7 days after seeding and lighting was used for the seedling phase (T5 florescent fixture) and seedlings were grown in flowing nutrient solution in the nursery for approximately two weeks before transplanting. After transplanting, lettuce plants were grown out in the channel for five weeks prior to harvest. The nutrient solution was continually cycled through the CropKing Fertroller where automatic pH and EC adjustments met programmed solution set points. The pH was maintained at 5.8 by the addition of dilute sulfuric acid. EC was maintained at 1.8 by the addition of concentrated fertilizer solution and source water.

* It is important to note that these trials were carried out over set periods of time and harvests were made regardless of plant readiness for sale. Clear comparisons were the main goal, and this resulted in low weights for some cultivars. Also, no supplemental lighting was used after transplanting even under these low light northern conditions. In a commercial operation, more time would have been give these heads to reach a saleable size or lighting would have been added to increase growth rate and crop quality.  


Some Concluding Thoughts

There are always many interesting observations from cultivar trials carried out across different seasons.  From these trials, I would like to make a couple observations in addition to the common trends of 1) decreased growth under lower light/winter conditions, and 2) more dense, compact, and more deeply pigmented lettuce grown under higher light levels.
The first important take-away from these cultivar trials is the importance of understanding your customers and market demands when selecting a lettuce cultivar. While it is a generally true statement that different lettuce cultivars grow at different rates, these differences can be clearly seen in this selection of leaf lettuces. For example, the Tropicana cultivar is a typical green leaf crop sold for soil production that can also be grown in the greenhouse. As can be seen in the images and yield numbers, this green leaf lettuce has a more rapid growth rate than the Lollo Biondo (blond, such as Livigna and Lozano) or Lollo Rossa (red, such as Carmesi and Orville)
cultivars in the evaluation. The Lollo lettuces were bred and developed for specialty
markets and have attributes such as color and texture that are not present in some of the other common leaf cultivars. On a per-plant basis; however, they may not produce a similar sized crop in a similar time period. Conversely, the smaller size of some of the Lollo cultivars may make them more appropriate for a leaf mix where their growth will not be too rapid for other varieties in the mix. These are just some of the factors that are important for growers to keep in mind as they select cultivars.


The second thought worth mentioning is best explained using pictures. These two images illustrate some of the impact of crop management on yield and production. The image on the left shows transplants at an appropriate size for transplanting (run 1) while the image on the left shows plants that are larger than optimum (run 4). In our greenhouse we typically transplant when the plants are similar to the size on the left. However, as sometimes happens, schedules and other jobs encroach on our work and we transplant a few days after optimum. Older transplants can be more stressed and take a little longer to transition to growth in the channel. This increased plant stress could be a key cause of the similar or lower weights observed in run 4 as compared to run 3 even when light levels were higher in run 4. So, proper cultivar selection should be paired with timely and appropriate management to obtain the best crop. 


Monday, April 15, 2013

Late Summer to Winter Bibb Lettuce Trial


Late Summer to Winter Bibb Lettuce Trial
Results from four separate trial runs of twelve Bibb cultivars 
in NFT production in Ohio
By Dr. Natalie Bumgarner

Introduction

Hydroponic lettuce production in the United States now encompasses a wide spectrum of lettuce types and cultivars. Although there is an increasing amount of diversity in the cultivars being produced in hydroponic greenhouses, Bibb cultivars still occupy a large percentage of the market. They are also often the first crop produced by many beginning growers around the country.  While some growers tailor their cultivar selection to seasonal conditions, many growers at a variety of scales produce a single cultivar for the whole year that is adapted to a range of conditions. Both of these production patterns, though, require the growers to be familiar with the growth habits, characteristics, and productivity of the cultivars. This trial was designed to evaluate a selection of Bibb lettuce cultivars through a range of late fall and winter conditions to evaluate their potential for greenhouse growers in the Midwest and northeast. Cultivars were obtained from a variety of seed suppliers to represent a broad selection of cultivars available to lettuce producers. 

Methods and Management

Primed and pelleted seeds were seeded by hand in pre-moistened 1” x 1” x 1 ½” rockwool cubes. Seeds were germinated in clear water in seeding trays in the nursery. Nutrient solution was added in the nursery 7 days after seeding. Seedlings were produced in flowing nutrient solution in the nursery for an additional week to two weeks before transplanting. After transplanting, lettuce plants were grown out in the channel for four to five weeks prior to harvest. The first two runs were carried out on the typical summer schedule (2+4 weeks) while the third and fourth were carried out in a more winter schedule of (3+5 weeks). The nutrient solution was continually cycled through the CropKing Fertroller where automatic pH and EC adjustments met programmed solution set points. The pH was maintained at 5.8 by the addition of dilute sulfuric acid. EC was maintained at 1.8 by the addition of concentrated fertilizer solution and source water.

* It is important to note that these trials were carried out over set periods of time and harvests were made regardless of plant readiness for sale. Clear comparisons were the main goal, and this resulted in low weights for some cultivars. Also, no supplemental lighting was used after transplanting even under these low light northern conditions. In a commercial operation, more time would have been give these heads to reach a saleable size or lighting would have been added to increase growth rate and crop quality. 


Concluding Thoughts

As I look over these interesting numbers from four consecutive runs of this Bibb lettuce trial, there are a couple thoughts that jump to the top of my ‘important take-home points’ list.

The first and likely most glaring message is that light, not surprisingly, is pretty important for lettuce growth and quality. As can be seen by the average solar radiation and weights in the previous tables, low winter light in northern climates can be a significant hurdle. It is clear that lengthening production cycles by two weeks in the winter didn’t produce similar sized heads to the late summer/early fall run. The fourth run had just a little more than 33% of the average solar radiation present in the first run (In future blog posts, we will break these numbers down to daily integrals). Average temperatures in the first two runs were a little higher as well (due partly to solar gain). However, the individual contributions of light and temperature are difficult to clearly separate.

The pictures that follow drive home the point that light/temperature relationships are crucial for lettuce growth and development. Supplemental lighting would have changed this equation substantially, but that is another broad topic altogether.  Also, additional time in the channels would have made many of the smaller Bibb heads quite marketable. Production timing and seasonal factors should not be overlooked if your goal is to produce consistently sized heads throughout the year in northern climates. 
  
The second important theme that is apparent in these yield numbers and the pictures that follow is the need to understand the variability in cultivar performance. While all the cultivars trialed here were bibb or butterhead lettuce, not all were bred for hydroponic or greenhouse production. In controlled environment production, consistency is key. Consistency is important not only within a harvest period, but also through the seasons. The second yield table shown above illustrates this point. The deviations across the 4 runs as well as the % weight loss from the highest yielding run (1) and the lowest yielding run (4). It is clear both in these variable yields and in the photos below that in our location without supplemental lighting, some of these cultivars are not suitable for year-round production. The larger framed lettuces tended to be the most variable across runs and were visually the least appealing under winter light conditions while many of the bibbs bred for greenhouse production were more consistent in weight and visual quality across the trials. These trends held true in both the green and the red cultivars.

Knowing your cultivars is crucial in creating an appealing and consistent product throughout the year! 


Thursday, March 7, 2013

An Introduction to the Process of Grafting in Greenhouse Tomatoes- Part 2


An Introduction to the Process of Grafting in Greenhouse Tomatoes- Part 2 

By Natalie Bumgarner, Horticulturist
CropKing, Inc. Lodi OH


So, what comes after the graft?

In the last blog post, we went through a brief photo tour of the first two steps in the grafting process (1. Setting the Stage, and  2. Doing the Grafting). However, when discussing grafting, it is important to know that preparation and grafting are only the first two crucial steps. Graft healing is that key third step in producing successful grafted tomatoes for your greenhouse. So, as the third blog in this series on grafting processes, I want to focus on methods of healing and the transition process from grafting to transplanting in greenhouse tomatoes.
 
The Healing Environment

It is important to understand that there are three crucial environmental factors involved in graft healing- humidity, light and temperature. Of course, these are the same key environmental elements that we all manage in our greenhouses, but the specific levels and ranges differ for graft healing versus production conditions.
  • Relative Humidity- Begin around 95% immediately after grafting and reduce as healing progresses.
  • Temperature- 80 to 84 °F is optimum
  • Light- Begin with essentially no light for the first day or two after grafting and then gradually increase to light in the range of 500- 700 fc or around 100 µmol/m2/sec.

    
The Healing Chamber- Location

When carrying out grafting, there are two kinds of locations typically used by growers. The first is a chamber where conditions can be closely maintained to optimize healing. While useful for some propagation or research facilities, most growers will not have access to dedicated growth chambers and will need to use their greenhouse or attached buildings. Graft healing in greenhouses has been done for many years, and small to mid-scale temporary structures can certainly provide you with adequate healing capacity if managed well.
 
The Healing Chamber- Design

Most commonly, healing chambers or tents are created with clear plastic within the larger greenhouse space. In these tents, humidity can be increased and maintained with misting either by hand or with an automatic mist system. Temperature and light also need to be carefully monitored and managed. Shade cloth in different weights or layers can be used to initially exclude light and then gradually increase light during healing. Be very careful to monitor temperatures because these clear plastic tents- even shaded- can heat up quickly in a greenhouse due to solar gain. This increased temperature can in itself be high enough to damage seedlings, but it can also quickly lower the relative humidity and desiccate young grafted plants. For more northern growers seeding and grafting in early winter, greenhouse healing chambers can typically be managed adequately (as illustrated in this blog). However, if grafting in the mid-to late spring or summer, maintaining appropriate temperatures in a tent in a greenhouse may become difficult due to ambient light and heat.  Under these conditions, you may need to use your head house or some other work area fitted with a temporary chamber and lighting. 


These two images show a small healing chamber constructed within a larger greenhouse (top). PVC pipe was used to construct a small tent first covered and lined with clear polyethylene plastic (4 mil construction plastic is fine) to allow a fairly tightly sealed airspace. A dome over the tray can also be used for smaller numbers of plants (bottom). Then shade cloth in one to two layers is used to cover the tent or dome.

Healing- The First Few Days


For the first day or two after grafting, near darkness is needed. This can be accomplished by covering with double or triple layers of shade cloth (depending on whether 50 or 70% shade cloth is used). Humidity is maintained with misting, but be sure to mist the plastic walls of the chamber or dome rather than the plants themselves. We want moist air to induce healing and not wet plants to encourage plant decay. 

Transitioning Back to the Greenhouse

The goal of graft healing is to allow the scion and rootstock to fuse together and form new vascular connections by providing low stress conditions. Then after connections are formed, the plants is gently brought back to typical production conditions. So, humidity levels start out around 95% and after ~5 to 7 days drier air is slowly introduced to the crop by increasing venting. Likewise, light is slowly increased by removing shade and/or increasing supplemental lighting and temperature is slowly reduced. Grafted tomatoes should be ready to transition back to the greenhouse in a little under or a little over a week depending a bit on the crop and environment.

In transitioning young grafted plants back to typical greenhouse environments, conditions are slowly changed and plants are closely monitored for wilting or signs of stress. If plants show signs of stress, you can increase humidity or reduce light again for a day or two. However, keeping plants in the high humidity healing environment too long can induce roots from the scion (adventitious). These roots will hinder proper graft healing. Eventually, a ‘moment of truth’ will have to be faced. Grafts that fail to heal after 7 to 14 days are unlikely to produce high quality grafted plants due to a variety of factors including improper scion/rootstock size matching, graft technique, genetic incompatibility, or healing environment.


Newly grafted and healed plants transitioned to the greenhouse and awaiting transplant.


These are close up images of graft unions approximately eight (L) and six (R) days after grafting. The plants have both already been transitioned back to normal greenhouse conditions.

Remember, no one achieves 100% success…


An unsuccessful graft where the scion has produced adventitious roots to absorb water from the high humidity air in the healing chamber. As the wilted scion illustrates, these roots hinder graft healing and the plant often dies under greenhouse conditions.


Tomatoes being transitioned after healing. Some are showing slight wilting, but have adequate grafts to sustain them. A few, though, are wilted down and will not survive. Successful grafting is based on skill in grafting and care in healing- both of which generally improve with practice! 


Planting in the Greenhouse


These two images show tomato plant graft unions approximately two weeks after grafting as they are being planted in the Bato buckets (L)  and a plant growing in the bucket approximately six weeks after grafting and four weeks after transplanting (R).

This blog completes our introduction to grafting in the greenhouse, but we will continue to provide updates on the growth of the plants and other facets of using grafted plants in small to mid-scale hydroponic greenhouses.  

Monday, February 18, 2013

An Introduction to the Process of Grafting in Greenhouse Tomatoes- Part 1


An Introduction to the Process of Grafting in Greenhouse Tomatoes- Part 1 

By Dr. Natalie Bumgarner, Horticulturist
CropKing, Inc. Lodi OH


  A row of young grafted and ungrafted tomato plants
 being trialed in our research greenhouse in Lodi, OH.
 All the grafting was done on site this winter. 
Grafting sounds interesting, so where should I begin?In the last blog post, we discussed some of the basics of grafting and the main reasons that growers would be interested in the technique. It is no surprise that over the last few decades, the use of grafting has become quite prevalent in greenhouse tomato production. While the benefits are intriguing for small to mid-scale producers, decisions related to acquiring grafted seedlings must be made.The two broad options are to purchase grafted seedlings or to produce all the seedlings needed in your operation on your own. Seedling purchase and transport costs can be quite high in some instances. So, producing grafts for your own operation is a viable option. It also provides the opportunity to trial a limited number of grafted plants or test different cultivars.  There is certainly a learning curve for producing grafted plants, though. So, I would suggest starting by only planning to graft a small portion of  your crop the first year to become familiar with the process and it potential benefits in your operation.  


Overview of the grafting process

There are three crucial steps in the process of grafting your own tomato plants.  1) Setting the Stage, 2) Doing the Grafting, and 3) Healing the Grafts. 

1.Setting the Stage-
             It is important to remember that grafting will change the space and time needs of your typical seedling production schedule. It will also require some investigation into rootstocks that will best fit with the cultivars you are currently growing (now referred to as scions). Rootstocks, like greenhouse tomato scions, tend towards more vegetative or generative growth patterns, and these attributes will influence how they will perform in your greenhouse operation. It will likely be beneficial to try a few different rootstocks to determine how they impact your crop.
             Also, more seed will need to be ordered, and seeding will need to take place earlier to meet typical schedules. It is best to allow an extra week or two in your schedule to account for graft healing. Due to seeding both rootstocks and scions, more space will be needed in the seeding area as well. Prior to beginning seeding for grafting, it is also important to do some seed germination trials as rootstocks and scions may not have the same germination percentage or rate. Growth rate of the seedlings may also differ. Having rootstock and scion plants of similar size is critical for grafting,  so multiple seedings are recommended .  Remember to keep detailed records of seeding and germination as these will be valuable in planning for future years.

2. Doing the Grafting-
             There are several methods of grafting, and benefits and potential drawbacks to each. For further information on some the grafting technique variations, the resources listed at the end of this post provide additional discussions. In current greenhouse tomato propagation, the most widely used method is the tube graft (also known as the splice graft or Japanese top graft). The tube or splice graft is what I have used for grafting in the CropKing research greenhouse. The advantages of the tube graft are the young plant size at which it can be completed and the potential for high throughput in grafting operations. It is a method than can be done quickly by hand, but it is also suitable for mechanized grafting as is more often carried out in Europe.  
             Before grafting begins, make sure to adequately address sanitation in your operation. Sanitation is very important in the grafting process, and poor practices in this area have caused loss to both propagators and growers in the past. The process starts with using high quality, clean seed ( and therefore plant) materials. Then care should be taken during the process starting with clean work surfaces and utensils. Periodic changes in razor blades and hand washing are also important steps during grafting.  So, without further delay, let me give you a brief overview of the main steps and techniques used for tube grafting that would be appropriate to use in your own greenhouse tomato crop.


Where to find additional information

Many Land-Grant Universities are currently carrying out research and publishing information in the area of use and management of grafted tomatoes. While some of the research is tailored to soil-based, outdoor or high tunnel production, there is still much the soilless greenhouse grower can learn from these publications- especially on the topic of grafting and healing methods. Some grafting related materials from universities active in the area include: